Happy Monday everybody! On this dreary January day, that most of you are probably experiencing, I thought I would give a quick indoor-project tutorial to brighten up your Monday.
One day last week, I had come across this Mason jar vase wall unit and knew this was something I needed to pin to my “Must make…” board on Pinterest. Nothing lands on this board unless, I have every intention to make it. I also, don’t let things hang out there too long before I make a plan of action and mark them off my to-do list. I knew I could complete this in no time, with a little help from my handy husband.
Here is another picture that inspired me to make this project happen.
Materials needed:
- Board for base, whatever size you would like (Mine was 1-1/2″D x 11″H x 28″L)
- Metal pipe clamps (found at any hardware store, I purchased 3 for $4.50)
- Screws for pipe clamps (I used 1/2″ screws)
- Screws to adhere the finished product to the wall (We used 3″ screws, as our board was 1-1/2″ deep.)
- Desirable jars, bottles or vases (I used 3-quart size jars.)
Here is the board I selected off our scrap pile. It was actually a part of an old building that had been torn down, so it provided the weathered-rustic look, I was hoping for.
I didn’t have to sand, distress, stain or paint my board. Just a good ole’ wipe down with an old sock and some water and then again, with some pledge. To change the look to adapt to a more modern style, you could always paint or white-wash your board or spray paint the pipe clamps to freshen it up. 
Here are the 3 – pipe clamps, which were my only purchase for this project. This purchase didn’t break the bank either at $4.50 for all of them! Got to love a budget-bang-for-your-buck project! The next picture gives you an idea of the size of the pipe clamps.
After wiping the board down well, I placed my 3 jars in the desirable spot to be able to mark the screw holes to attach the pipe clamps. 
Then I marked my screw hole, based on where the clamp would sit in accordance to the lip of the jar.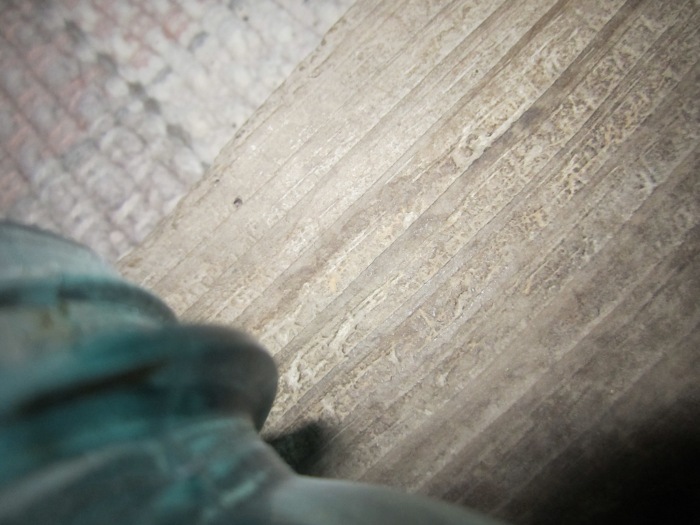
We decided to drill through the last notch of the pipe clamp, to give us a better start to screwing them down.
This also allowed for the tightening mechanism to face the front on all jars, to provide easy access to remove the jars and tighten them back up, if I ever wanted to switch the jars out.
Before screwing the pipe clamps down to the board, we opened them all the way up, to allow full access to screw them on.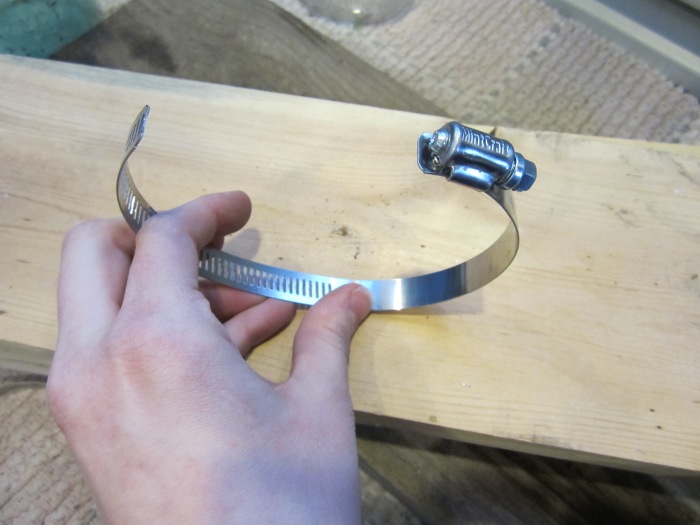
We used a drill bit the size of our screw to pre-drill the holes on all the pipe clamps. This is what they all looked like before we attached them all to the board.
Here they are attached to the board, before we tightened the jars into place.
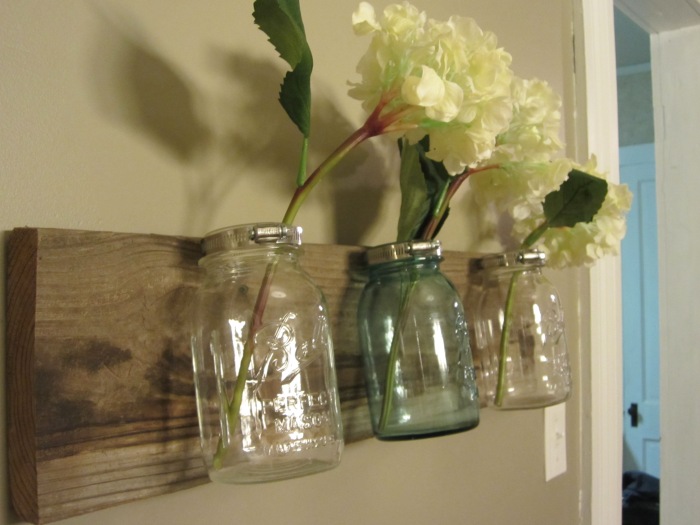
Now, to explain a dilemma. When you screw the pipe clamps straight to the board without attaching a small piece of wood behind them, you have to understand that your jars will tilt back on the top because of the curvature of the jar. I liked this look, however, if you do not, an easy fix would be to drill through a small piece of wood to bump the pipe clamp out far enough so the jars sit straight.
Here we removed all the jars to screw the board to the wall. Luckily, the studs fell behind all the jars, therefore the jars disguised the screws.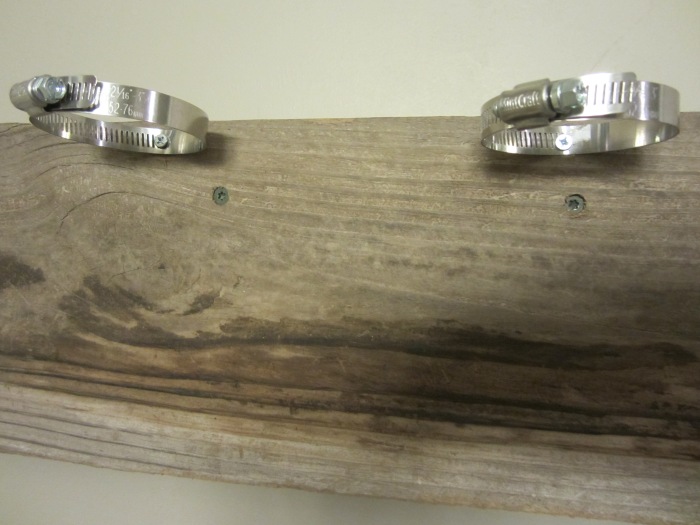
Here is the finished product with a few hydrangea stems I had at the house.
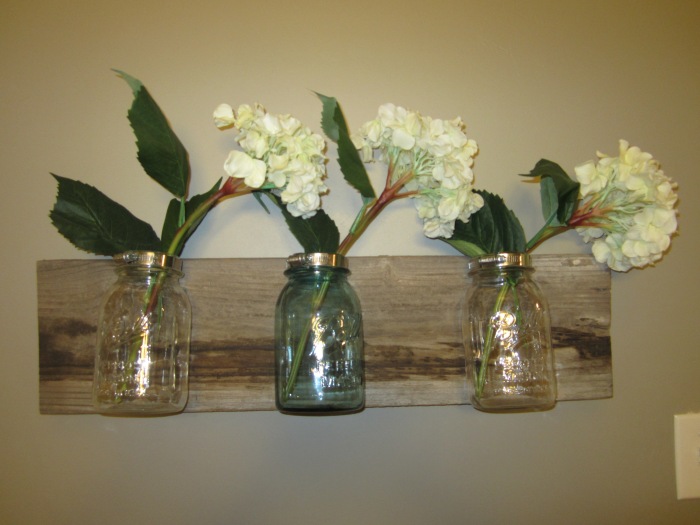 I cannot wait to switch these out for all the seasons. I’m looking forward to putting fresh cut peonies from our garden in water in the spring and planting petunias, or a similar flower, during the summer. I could easily switch them out and put fresh greenery for winter or candles. Oh the possibilities are endless!




Looks really nice and adaptable to other surfaces as well – thank you for the idea!
Such a great idea! Quick and Easy too!
Pingback: How to Throw a Craft Weekend with your Friends {awesome giveaway too!!} - Small Things Are Big Things
Pingback: How to Throw a Craft Weekend with your friends (and a giveaway)
Thank you so much for walking thru this! I’ve been wondering how to attach them 🙂
Pingback: 140 Diy Mason Jar – Crafts, Lights, Storage, Vases, Glitter | Rilane - We Aspire to Inspire
You didn’t elaborate on the second picture showing the jars attached to the wood with some type of band instead of hose clamps. Do you know the details? I don’t exactly like the hose clamp method since it’s so widely used and the clamps are too shiny.
I do not know the details of that specific attachment. I only used that picture as an inspiration. You might try an old leather belt or something along those lines. As for how to attach it, your guess is as good as mine. 🙂
Pingback: DIY Mason Jar Reclaimed Wood Wall Hanging | My So Called Crafty Life
Pingback: Give Your Home a Soul Series: Flowers | Life Styled Spaces
Reblogged this on JacelArt and commented:
Found online blog on how to create a diy jar wall decoration. The ideas are endless with the basic foundation of how to attach the jars to wood backing. One could treat the wood with paint, vinyl, paper, fabrice. The same could be done for cover the pipe clamps with ribbon, paper, ect.
Really love this idea
beautiful project
Very nice ….can be used inside or out.
This is a wonderful project, thanks for sharing.
this is a really neat idea thank you for sharing
I Just recieved 2 Mason Jars in the Mail-THIS IS what i will do W Them!! Ty for tHe Idea!!!!
Looks really nice
A beautiful way to brighten any room !!
Awesome
I did it and it was awesome. Thank for the tip
This is a pretty nifty and very easy to do, “DIY – Project”, & it’s really great looking as well!
I love these mason Jars!
You did a beautiful job! I was amazed at how little it costs to produce a decor so pretty! AWESOME JOB!